Hey there, sunshine seekers! If you’re ready to harness the power of the sun and make a serious eco-friendly impact, you’ve come to the right place. Installing solar panels is a game-changer in cutting down on your carbon footprint and slashing those electricity bills. In this detailed guide, we’ll walk you through each step of the installation process so that you can confidently embark on your solar journey. From assessing your property for optimal sunlight exposure to navigating permits and approvals, we’ve got you covered. So, grab a cup of coffee and let’s dive into the sunny world of solar panel installation!
Introduction to Solar Panel Installation
So, you’re thinking about jumping into the solar panel game? That’s awesome! Solar panels are a fantastic way to cut down on your energy bills and reduce your carbon footprint. It’s not as complicated as it might seem, and with the right guidance, you can get those panels up and running in no time. First off, make sure to assess your roof’s condition. Strong solar installation requires a sturdy foundation. Then, grab some basic tools like a drill, screwdriver, and wire cutter. With these in hand, you’ll be well-equipped to tackle the physical installation process.
Once you’ve prepped your roof and gathered your gear, it’s time to start mounting those panels! Make sure to follow all safety guidelines throughout this step – we don’t want any preventable accidents on our hands. After securing the panels in place, connect them to each other using their built-in wiring systems. Don’t forget about getting that crucial city permit – it’s a must for any new solar setup. Finally, once everything is good to go and hooked up properly, give yourself a pat on the back because you’ve just taken an incredible step toward sustainable living!
Assessing Your Property for Solar Panel Installation
So, you’re thinking about going solar? Well, before diving in headfirst, it’s crucial to assess your property for solar panel installation. First off, take a good look at your roof. Is it shaded by trees or other buildings? A sun-soaked roof is prime real estate for solar panels. Next up, consider the direction your roof faces – south-facing roofs typically receive the most sunlight throughout the day.
Now, let’s talk about space. How much room do you have for those shiny solar panels? They usually require about 100 square feet per kilowatt of installed capacity. Also, think about any potential obstructions like vents or chimneys that could get in the way of a smooth installation process.
Last but not least, don’t forget to check your local regulations and permits – every city and county has its own rules when it comes to solar energy installations. So there you have it – a quick rundown on assessing your property for solar panels!
Choosing the Right Solar Panels for Your Needs
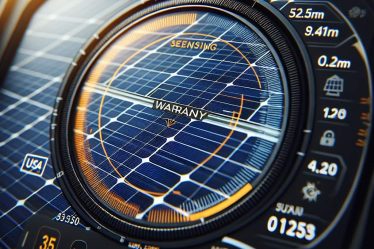
When it comes to picking the right solar panels for your home or business, you want to consider a few key factors. First off, quality matters. Look for reputable brands with a strong track record and good warranties. Secondly, think about efficiency – higher efficiency panels can generate more power in limited space. Finally, consider your budget – there are different types of panels at various price points so find one that works for you.
Once you’ve got your panels sorted out, it’s time to choose an inverter that’ll convert all that solar energy into usable electricity. Microinverters are great for getting the most out of each panel individually, while string inverters are cost-effective and work well if your panels have consistent sun exposure throughout the day. Don’t forget about installation – finding a skilled and licensed installer is crucial to making sure everything runs smoothly from start to finish!
Obtaining Permits and Approvals for Solar Installation
Before you start slapping those solar panels on your roof, you gotta make sure you have all the green lights from the local authorities. First off, check in with the city or county planning department to see what kind of permits you need. They’ll want to know where exactly you’re putting up the panels and how they’re gonna be connected to your crib. Next, get in touch with your utility company ’cause they need to give their stamp of approval too. It’s like crossing all your t’s and dotting those i’s before making a big move.
Once you got all those permits squared away, it’s time for inspection! The city or county inspector will swing by and give your setup a once-over to make sure it meets safety standards. Then comes the final nod from the utility company so they can hook up your system to the grid. Don’t sweat it though – just stay on top of those permit applications and inspections, and soon enough you’ll be soaking up that sweet solar power!
Preparing Your Roof or Ground for Solar Panel Installation

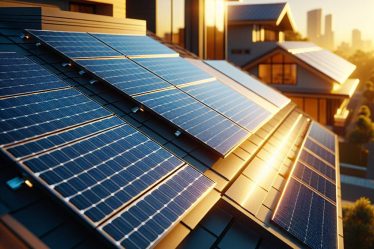
So, you’re thinking about going solar? That’s awesome! But before you can start soaking up all that sweet sunshine and saving some serious cash on your energy bills, there are a few things to consider. First off, let’s talk about your roof or ground – that’s where your solar panels are gonna go. If you’ve got a roof, it needs to be in good shape and facing the right way to get the most out of those rays. And if you’re thinking about ground-mounted panels, well, you need some open space with good sun exposure. It might take some work upfront, but trust me, it’ll be worth it in the long run.
Now, I don’t mean to rain on your parade here, but prepping your roof or ground for solar panel installation isn’t exactly a walk in the park. You might need to trim back some trees or reinforce your roof – and that’s just the beginning! But hey, don’t sweat it – with a bit of planning and maybe some professional help if needed, you’ll have those panels soaking up sunshine in no time. Just think about all the good vibes (and savings) that come from harnessing renewable energy – now that’s something to smile about!
Installing the Mounting System and Panels
Alright, let’s talk about getting those solar panels up and running. First off, you’re gonna need to set up the mounting system. After that, it’s time to get those panels installed. Make sure you secure everything nice and tight so they can soak up all that sweet solar energy.
Once the mounting system is good to go, you’ll carefully place each panel in its designated spot. Take your time with this step – precision is key! And don’t forget to connect them all together once they’re in place. Ready to harness the power of the sun? You’re almost there!
Connecting the Solar Panels to Your Electrical System
So, you’ve got your solar panels all set up, but how do you connect them to your home’s electrical system? Well, it’s crucial to make sure everything is safe and up to code. First off, always consult with a certified electrician before attempting anything on your own. Safety first, right? Once you get the green light from the electrician, they’ll help you determine the best way to hook up your panels to your electrical system. It may involve installing an inverter and a bi-directional meter if you’re planning on selling excess power back to the grid. Remember, this part is no joke – safety and compliance are non-negotiable.
After getting the go-ahead from the electrician and figuring out what equipment you need, it’s time for some serious wiring work. This step involves carefully connecting the DC wires from your solar panels to the inverter and then linking the AC output from the inverter to your main electrical panel. It’s like putting together an intricate puzzle – every piece has its place! Throughout this process, attention to detail is key because any mistakes could lead to inefficiency or even safety hazards down the line.
Once all connections are made, it’s time for testing! After ensuring that everything is properly connected according to local codes and regulations (and giving yourself a well-deserved pat on the back), turn on that sunshine-powered system of yours and bask in its renewable glory! Keep an eye on things initially for any hiccups – better safe than sorry!
Testing and Commissioning Your Solar Panel System
So, you’ve got your solar panel system installed—nice work! But before you start soaking up all that free energy from the sun, it’s crucial to test and commission the system to ensure everything is working smoothly. Begin by conducting a thorough inspection of the panels and wiring, checking for any signs of damage or loose connections. Next, test the voltage and current output of each panel to make sure they’re generating power as expected. Once everything checks out, it’s time to commission the system by connecting it to your home’s electrical grid and making sure it integrates seamlessly.
During the testing phase, pay close attention to any irregularities in power output or fluctuations in voltage. If you notice anything out of the ordinary, it’s essential to address these issues before proceeding with commissioning. When commissioning your solar panel system, follow all local regulations and guidelines to ensure compliance with safety standards. Additionally, consider hiring a professional electrician if you’re not confident in your ability to safely connect the system to your home’s electrical setup.
Remember: safety first! As tempting as it may be to rush through this process and start enjoying your newfound clean energy source, taking the time to thoroughly test and commission your solar panel system will pay off in the long run. By ensuring everything is functioning correctly from the get-go, you’ll minimize the risk of future problems and maximize the benefits of going solar!
Maintaining and Monitoring Your Installed Solar Panels
Once you’ve got those solar panels up and running, it’s crucial to stay on top of their maintenance. Regular checks can help prevent potential issues and keep your system running smoothly for years to come. So, what should you be looking out for? Well, start by inspecting the panels for any dirt or debris that might be blocking the sun’s rays from hitting them properly. A quick hose down every now and then can make a big difference.
In addition, keeping an eye on the inverter is key – it’s the heart of your solar power setup! Look out for any error messages or unusual blinking lights. If something seems off, don’t hesitate to call in a professional to take a closer look. Remember, staying proactive with your panel maintenance can save you time and money down the line!
Popular Questions
1. What are the initial steps to consider before installing solar panels?
Prior to installation, it’s crucial to conduct a site assessment, check for any shading issues, and ensure your roof is structurally sound.
2. What is the typical timeline for installing solar panels on a residential property?
The timeline can vary based on factors such as system size and complexity, but a standard residential installation often takes 1-3 days.
3. How do I determine the optimal placement of solar panels on my property?
To maximize sunlight exposure, panels should ideally face south and be installed at an angle equal to your latitude, though this can vary based on specific site conditions.
4. What maintenance is required after solar panel installation?
Regular inspections for dirt or debris, as well as monitoring system performance, are key components of post-installation maintenance.